
Upgrading the factory TOYOTA RAV4 DASHBOARD SPEAKER can take your audio system from lackluster to incredible. The stock speakers often leave much to be desired, providing poor sound quality and limited volume. Replacing them with aftermarket speakers can make a world of difference, providing cleaner, crisper sound across all frequencies.
In this guide, we’ll walk through the complete process of replacing the dashboard speakers in a Toyota RAV4. With some simple tools and new speakers, you can upgrade the sound in your RAV4 in just a few hours. We’ll cover removing the old speakers, installing the new ones, making all the necessary connections, and testing the new system. Follow along below for a complete step-by-step DIY speaker upgrade.
MATERIALS NEEDED
Before getting started, you’ll need to get your hands on the following:
- [amazon link=”B01NB0YF2L” title=” JBL CLUB3020 3.5″ speakers” /] (we recommend component speakers with separate woofers and tweeters)
- Speaker wiring harness adapters
- Basic hand tools (screwdriver, socket wrench, trim removal tools)
- Wire strippers/crimpers
- Electrical or masking tape
You’ll also want to have access to your vehicle’s owner’s manual, which includes specifics on dashboard disassembly. Be sure to use speakers that fit the openings in your particular RAV4 model and year. We have some more info about TROUBLESHOOTING WIND NOISE IN YOUR RAV4.
TOYOTA RAV4 DASHBOARD SPEAKER UPGRADE STEP-BY-STEP INSTALLATION
With the necessary gear in hand, you’re ready to dive into the installation process:
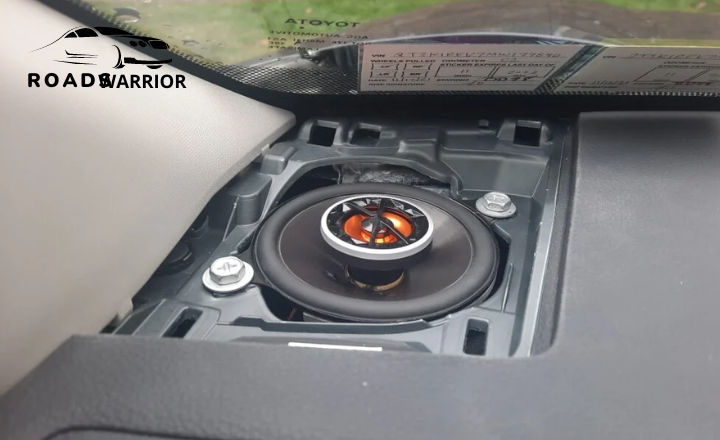
LOCATE THE SPEAKER COVER
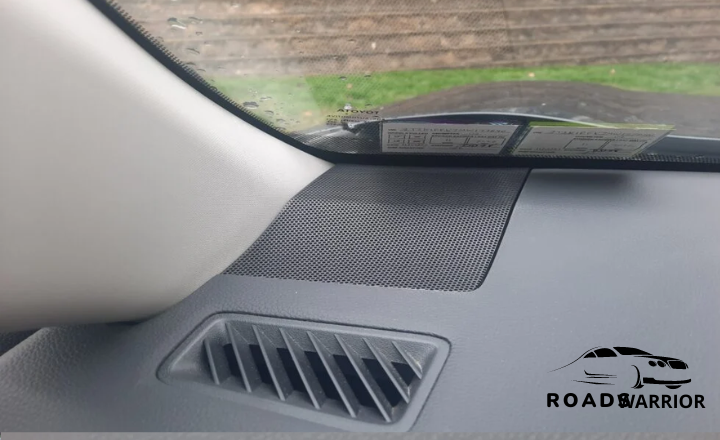
The first step is to locate the speaker cover on the dashboard. In the RAV4, the speakers are positioned on the top section of the dash near each A-pillar. You’ll see a circular plastic cover over each one.
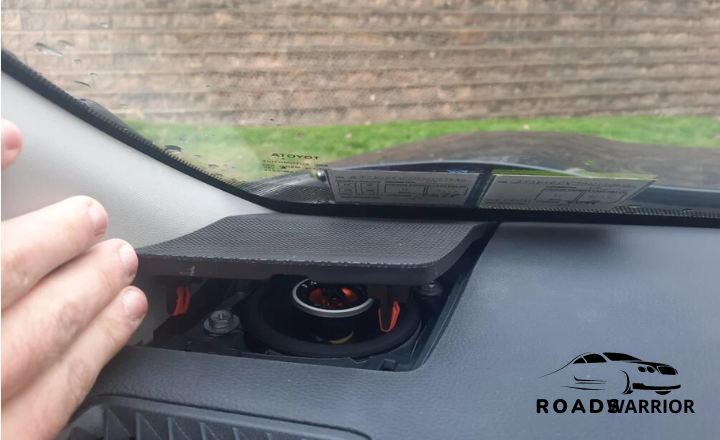
POP THE SPEAKER COVER OPEN

Use a small flat head screwdriver or trim removal tool to gently pry open the speaker cover. Insert the tool into the seam around the edge of the cover and slowly work your way around to release the clips securing it. Be careful not to damage the cover.
REMOVE THE SPEAKER COVER

Once the cover is loose, set it aside in a safe place. You’ll need to reinstall it later.
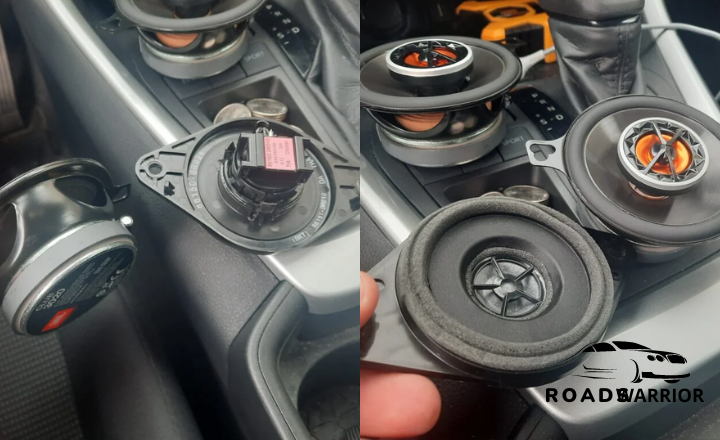
REMOVE BOLTS FROM THE OLD SPEAKER

With the cover off, you’ll see several bolts holding the factory speaker in place. Use a socket wrench to remove these bolts so you can detach the speaker. Setting the bolts aside in an organized fashion makes reinstallation easier.
DETACH AND REMOVE THE OLD SPEAKER
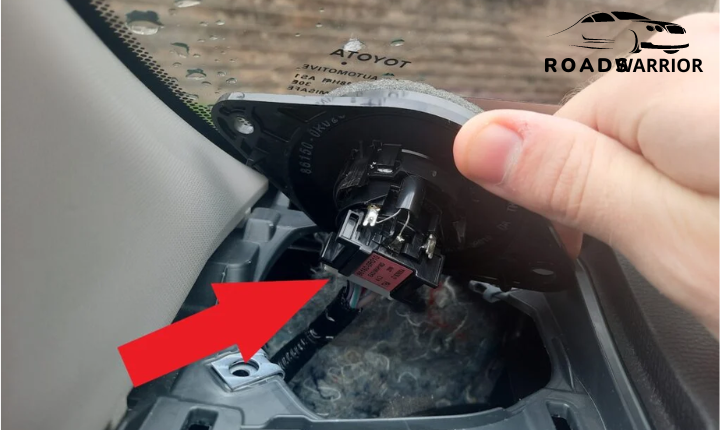
After removing the bolts, you can now detach the electrical connector and remove the old speaker completely. Inspect the connector to make sure it is still in good condition before reusing it.
ATTACH THE NEW WIRING HARNESS TO THE NEW SPEAKER
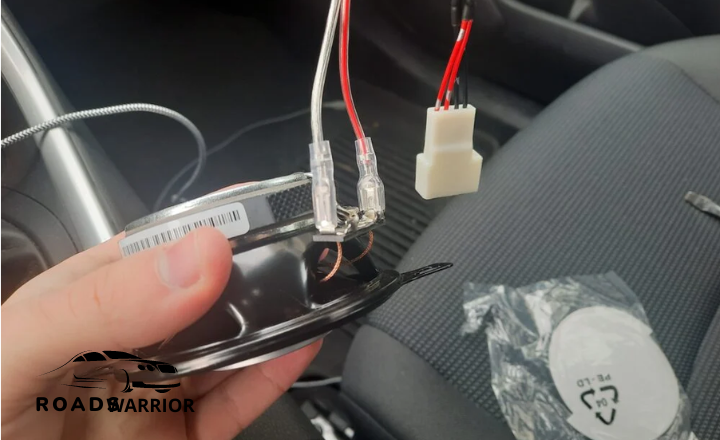
Your new aftermarket speakers will come with a wiring harness adapter. Attach this harness to the new speaker now so it’s ready for installation. Consult the instructions for your specific speakers.
CONNECT THE NEW SPEAKER TO THE CAR

Carefully connect the factory wiring harness to the new adapter harness you just installed on the speaker. This provides power and audio signal to the new speaker.
POSITION THE NEW SPEAKER
With the electrical connections made, you can now mount the new speaker in the opening. Align the speaker holes with the empty bolt holes in the vehicle.
REINSTALL THE BOLTS
Insert the factory bolts to secure the new speaker, tightening them down snugly but being careful not to overtighten.
REPLACE THE SPEAKER COVER
With the new speaker bolted into place, you can snap the plastic speaker cover back on. It should clip or screw back just like the factory cover you removed earlier.
Follow these same steps to remove and replace the speaker on the other side. With both new dashboard speakers installed, you’re ready to test out the upgraded sound.
TESTING AND WRAPPING UP
Turn on your RAV4’s stereo system and play some familiar music tracks to test the new speakers. Assuming proper installation, you should notice cleaner highs and midranges as well as improved bass response.
Just like that, you’ve successfully upgraded the dashboard speakers in your Toyota RAV4! Improved sound quality and volume will make every drive that much more enjoyable. Proper component speakers can provide years of stellar performance.
CONCLUSION
Upgrading your TOYOTA RAV4 DASHBOARD SPEAKER is one of the best ways to improve your driving experience. With better sound quality and louder, distortion-free volume, music and audio come alive. You could also enjoy the Radio music. Our step-by-step guide shows how straightforward it is to replace the dashboard speakers in a Toyota RAV4.
While it requires some dashboard disassembly, the project can be completed in an afternoon by someone with minimal stereo installation experience. The hardest part is removing interior trim; installing the speakers themselves is quite simple.
Just take your time, follow the instructions, and be careful not to damage any vehicle components. Soon you’ll be enjoying crystal clear highs and tight basslines from your RAV4’s upgraded speaker system. The improved daily drive is well worth the effort.